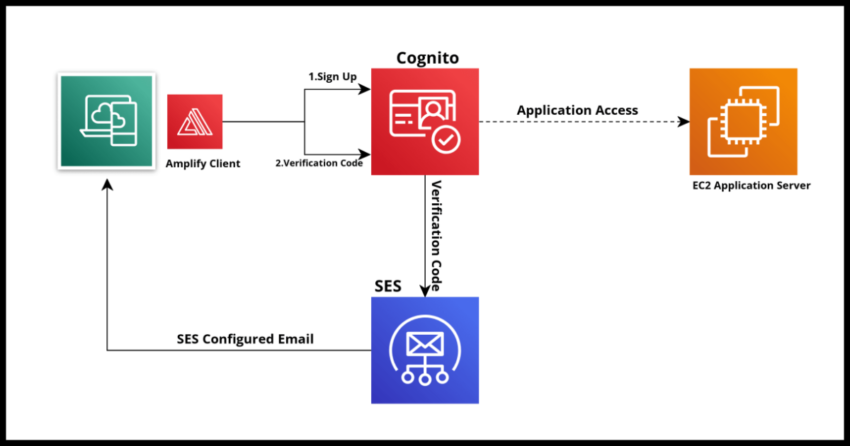
Cognito User Pools are an excellent option for applications to offload the involved and critical workflow of signing up, verifying, authenticating and managing users of the application. With Cognito User Pools, applications streamline the entire process while also getting all the benefits of using robust and modern authentication protocols like OAuth 2.0 and OICD – Open ID Connect.
In this article on creating Cognito User Pools, I covered in detail some of those benefits and reasons to use a service like Cognito (or a competing option from a vendor like Okta) for managing the authentication process. In a nutshell, security and authentication are important and very difficult to do correctly and even then, very time consuming to manage. Hence the trend to use services like Cognito. In the article linked above, I also covered in step by step detail the steps to create a Cognito User Pool. I encourage you to review that if that is what you are looking for.
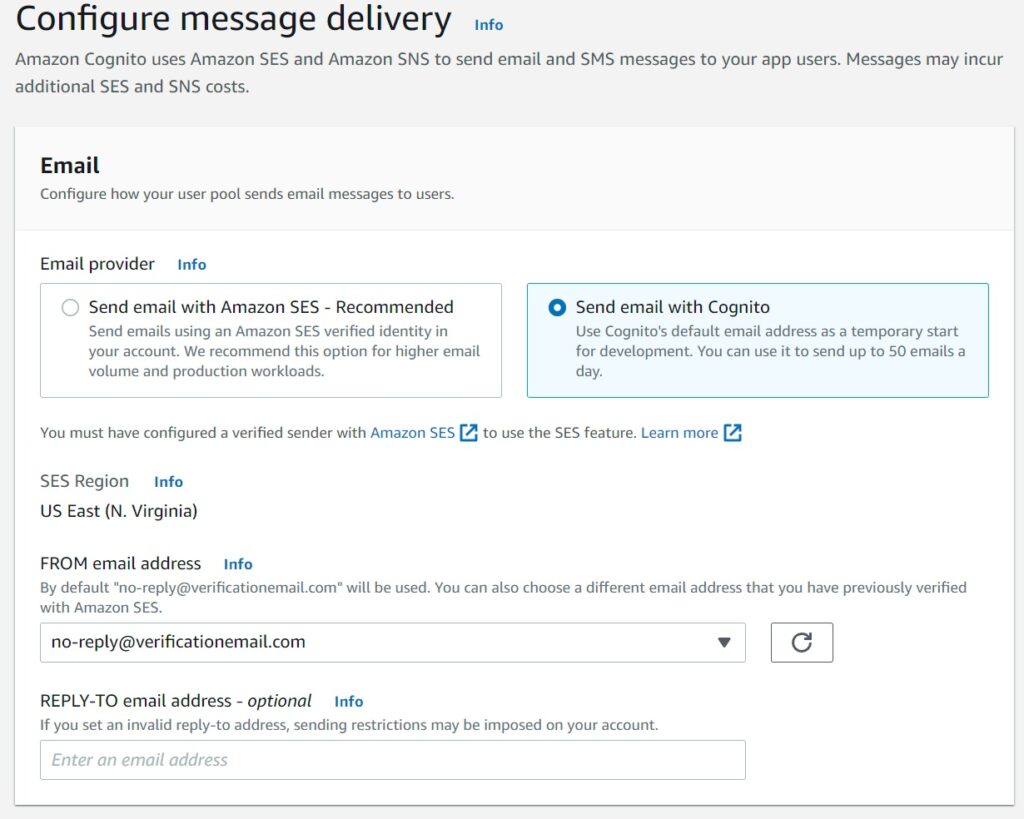
In this post, I am covering how to integrate a Cognito User Pool with as SES Configuration Set. If you had followed through that article, you might have noticed that the pool we created went with the Cognito Default for the message delivery as shown from this screenshot below.
And also the same was done in the Cloudformation yaml definition by setting COGNITO_DEFAULT value for the EmailSendingAccount property.
EmailConfiguration:
	EmailSendingAccount: COGNITO_DEFAULT
The default setting may be sufficient to get one’s feet wet using a Cognito Pool and testing out the initial development efforts, but it is not going to scale well in an actual production application.
Issues with the default Cognito Email
The biggest issue with going with the default value is the hard limit of 50 outbound messages a day. If you never expect to exceed this cap then you could probably live with it but honestly, why should you? As I will demonstrate in this article it is quite easy to get going with an SES Configuration Set that you can use for your account.
The other issue is if you would like to override Cognito’s default mail templates and perhaps send out your own organizations branded emails, you will need to do so with SES. While Cognito has triggers that allow you to embed certain html elements in the mails it sends out, this has some limitations on character sizes and such which make it difficult to work with if you have a complex mail template. In that case you would need to use an external mail provider – and it does not need to be SES – but again why not?
I will cover both the use cases – customizing Cognito mails with your own HTML values and completely overriding Cognito in future articles. For now, will keep it on the basic focus of defining your own SES Configuration Set so we can have Cognito send out more than the hard limit of messages a day.
SES Configuration Sets explained and how to create them
I prefer to maintain Cloudformation templates as a general rule so as to avoid manually duplicating tasks in different account and regions – but sometimes it is just easier to work with the console for one time tasks and this may well fall into such a category if you really only use one region. In any case I will demonstrate how to define this in Cloudformation as well below.
For the basic use case with no special handling in the console it is as simple as just naming your config set.
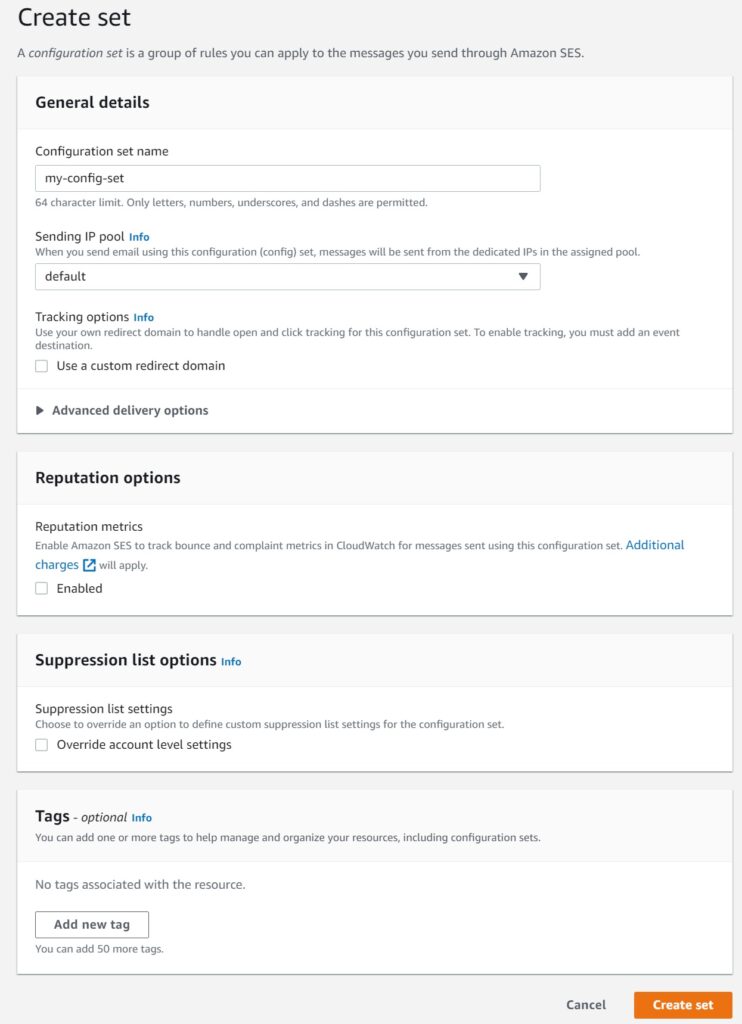
There are essentially two things Configuration Sets allow you to customize, if you want them.
1. IP Address Range for Sending Emails
If you have so configured your account to use a predefined set of ranges for “reputational” reasons with your clients, then you can configure SES to use that.
2. Event Destinations and Tracking
This is how you want to track and manage your mail results – bounce notifications, success alerts and the like. Its one of those things where it actually is easier to define in Cloudformation because you will have all the other components you need already defined in the same stack. For instance if you want your mail events sent to a Kinesis Firehose for tracking using Kinesis Data Analytics or perhaps to a Lambda to save in a database like DynamoDB, then you can configure your SES Configuration Set with such details.
I cover this topic is full detail in my write up on how to create a fully serverless email system. Do take a look at that if you are interested.
But for the basics of a Configuration Set without any destinations or tracking and such. It is just as trivial inside a Cloudformation Template.
MyConfigSet:
    Type: 'AWS::SES::ConfigurationSet'
    Properties:
      Name: my-config-set
That is all you really need.
And without going into the gory details – please see the linked article for that – if you want to define destinations and such, it would look something like this.
Destinations:
    Type: 'AWS::SES::ConfigurationSetEventDestination'
    Properties:
      ConfigurationSetName: !Ref MyConfigSet
      EventDestination:
        Name: my-destination
        Enabled: true
        MatchingEventTypes:
          - "delivery"
          - "bounce"
        KinesisFirehoseDestination:
          DeliveryStreamARN: !GetAtt Firehose.Arn
          IAMRoleARN: !GetAtt SESRole.Arn
Integrating your Cognito Pool with the Configuration Set
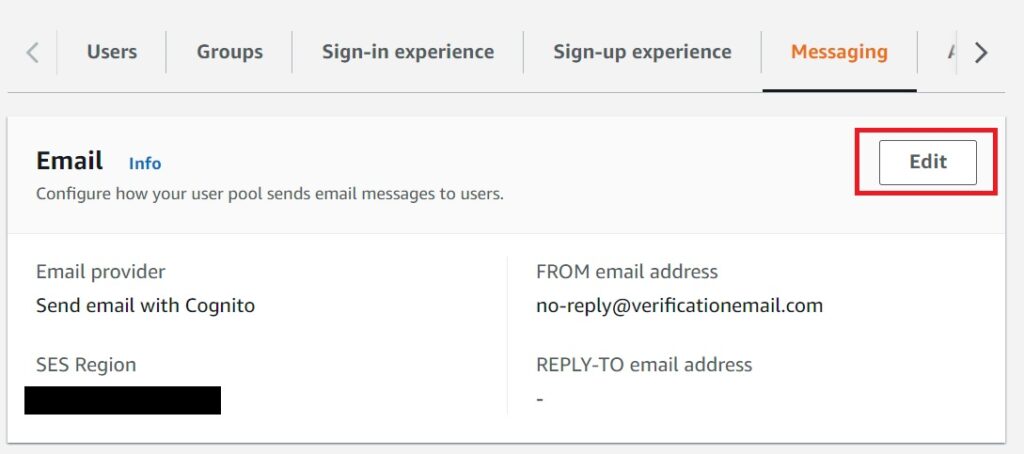
Now that you have your basic configuration set ready, in the console navigate to the messaging tab of your user pool and hit the edit button as shown below.
And then in the next prompt, select the Configuration Set you created from the dropdown.
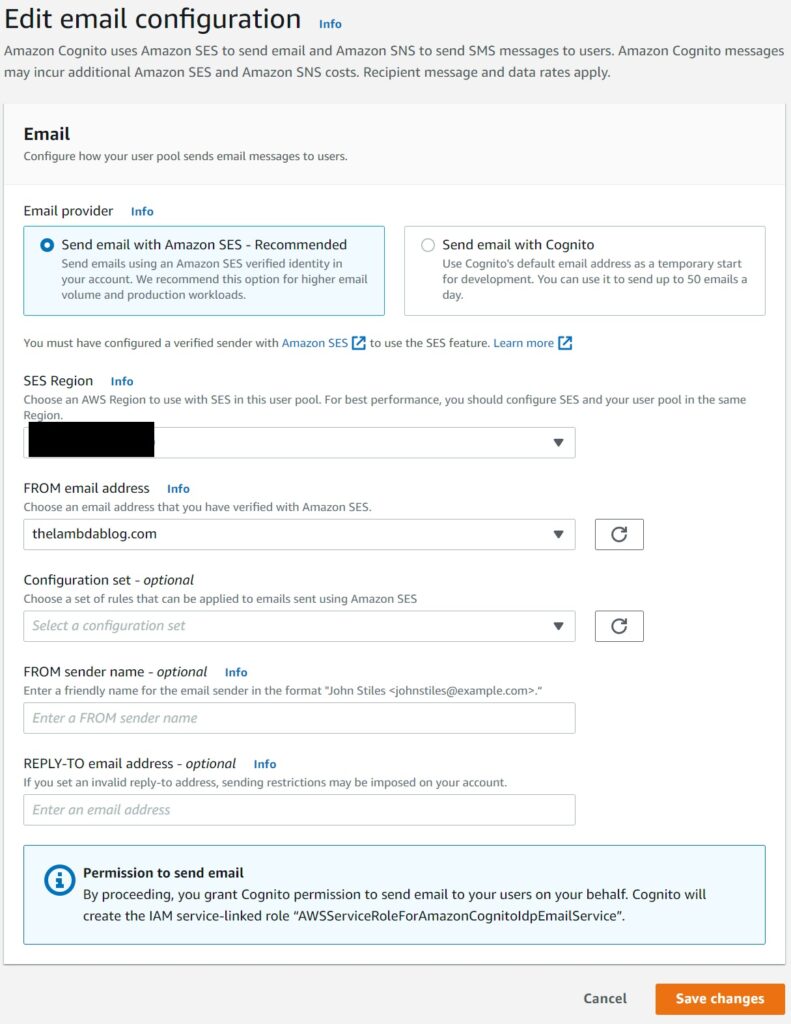
You can also now customize the experience for your targets further by choosing verified identifies for your from and reply-to options.
Doing the same in Cloudformation simply entails changing the email Configuration property of the user pool (as a reminder see here for the full template) from COGNITO_DEFAULT to DEVELOPER for the EmailSendingAccount property with references to the ARN of the from account.
EmailConfiguration:
    ConfigurationSet: !Ref MyConfigSet
    EmailSendingAccount: DEVELOPER
    From: "verifiedfromemailaddress@yourdomain"
    SourceArn: "ARN of the email address"
And you should be all set. As mentioned in future articles, I will cover even more email customization options for Cognito.