CloudFormation Stacks are a key component of maintaining Infrastructure-As-Code In the past I have written about deploying CloudFormation Stacks using AWS SAM and of course I personally utilize them for building serverless applications. Using AWS SAM is of course a great way to get started quickly and during development – one I personally primarily use before an application or service is fully complete.
However we could probably benefit from a more automated, so called CI/CD (Continuous Integration/ Continuous Deployment) type DevOps process for higher environments like Production deployments, especially important when you possibly work in an environment with a whole team potentially working on parts of the same CloudFormation Stack. This is where CodePipeline comes into play.
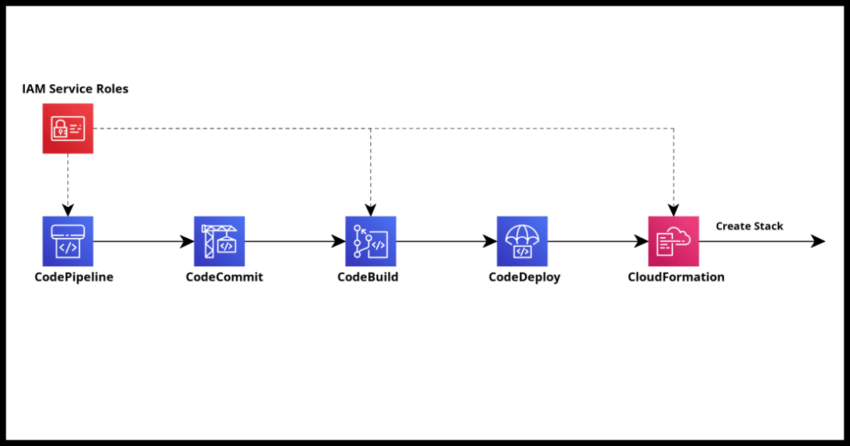
With CodePipeline, you can as the name suggests set up a continuous code deployment pipeline integrated from your choice of source control repository including the common GitHub or if you prefer AWS own Git based repo CodeCommit, to building your code with CodeBuild and ultimately deploying it using CloudFormation.
There is of course an initial setup process which we need to go through. If you have used other Build and Deployment pipeline tools in the past, you are probably going to be leery of these in general as I was with CodePipeline, but I have to admit, the process was relatively painless for building and deploying my first CloudFormation Stack – a pleasant surprise from some other experiences in the past where I have spent more time on the build and deployment infrastructure than I did on the application business logic code base.
The first run had some extra time spent on creating roles and such for CloudFormation to use – but subsequent pipelines were relatively quick to setup.
But though the tooling is great, this is also a side benefit of working with serverless applications without overly complex build files reducing the pain of server provisioning and environment management overhead and all that good stuff. Having said that – this guide is generic from a setup perspective to whether you have serverless components or not – the buildspec.yml definition might vary depending, but if you are familiar with AWS SAM deployments, then the buildspec I have in the walkthrough should be almost exactly applicable to your own CloudFormation Stack barring of course runtime parameter variables and such which you might need to set.
Alright lets walk through an end to end screen by screen setup.
Create an IAM Role for CloudFormation to use
We are going to be needing a specific role for CloudFormation to use during the last stage of the CodePipeline setup – the deployment stage. While all the CodePipeline and CodeBuild specific roles will be created for you during the first time setup of a pipeline in a region, the console does not do so automatically for the CloudFormation IAM role needed to actually deploy the build artifacts.
Allow me to reduce some frustration at being interrupted during the setup process to go and create a role by having you create one in IAM before we go about creating the pipeline.
Navigate to IAM -> Roles and hit the Create Role button.
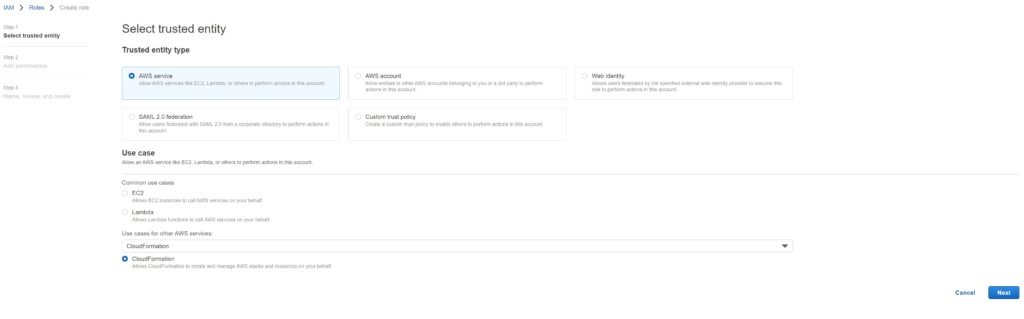
The Trusted Entity type is AWS service and in the search bar – search for and Select CloudFormation and select it.
Once done, hit next.
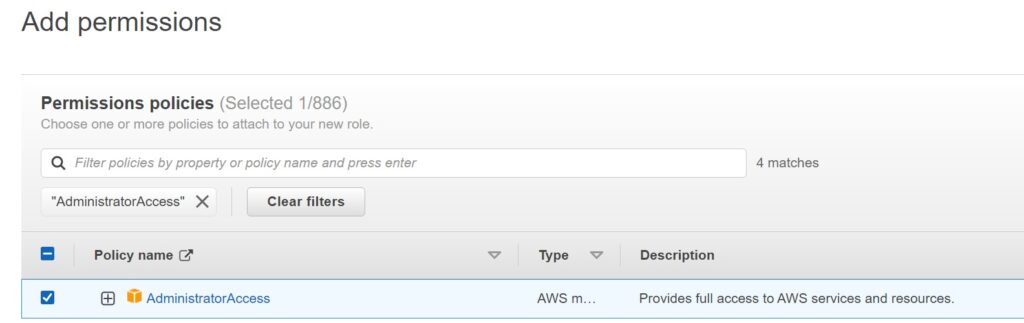
In the next screen – search for “AdminstratorAccess” and choose that policy as the permission.
It is probably possible to tailor the access more specifically if you want – but CloudFormation generally needs elevated permissions to create things in an account and this is OK to do in my opinion.
Hit Next after choosing the permission.
In the final screen – add a IAM role name that is meaningful – like the one I typed in the screen shot below and create the role.
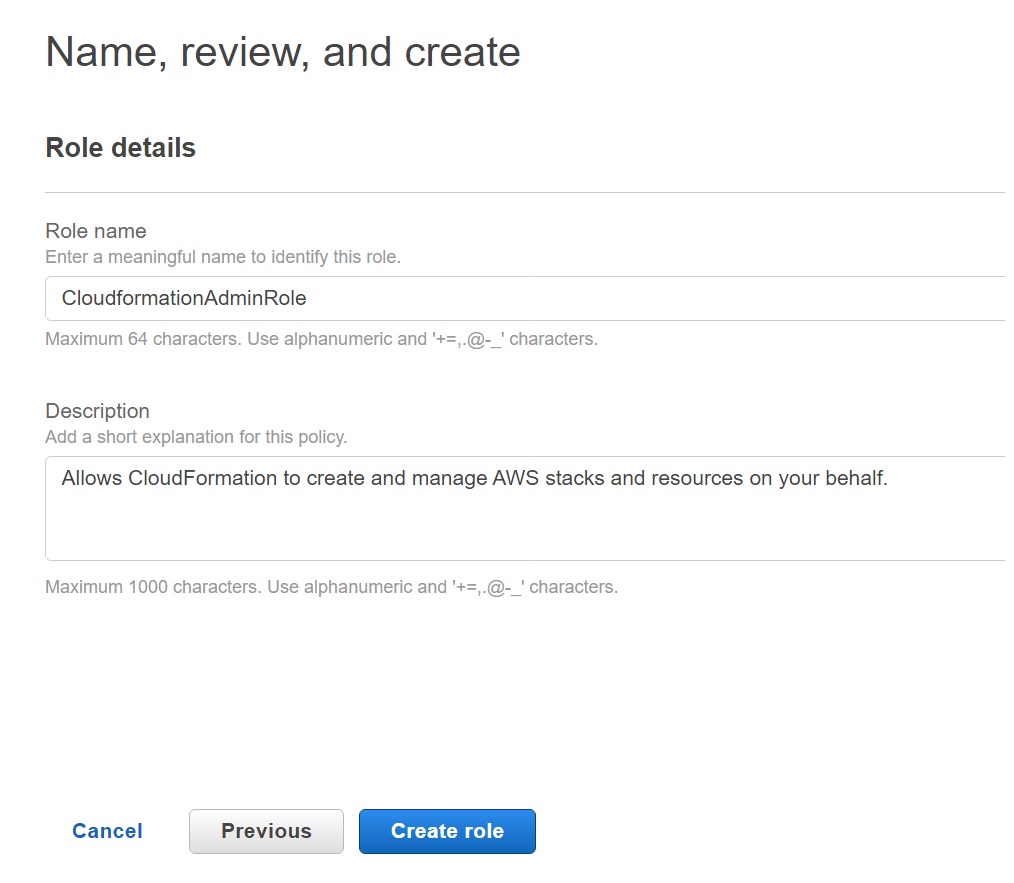
Keep a note of the role name you used – as mentioned we will be using this in the last stage of the CodePipeline setup.
Creating a CodePipeline for a CloudFormation Stack
Within the AWS console under Developer Tools, you will see options to create Builds Projects, Git repos, Deployments and all individually – and you can depending on what you need.
However, creating a CodePipeline walks you through the process of setting the stages individually and it makes sense to start there. It will even let us create a CodeBuild Project during the Build Stage which we will walk through.
Note – have a Code Repository and Branch ready for use.
You will be needing to provide the repo and branch name that triggers the build – so best have something ready for testing before proceeding at this point.
Initiating a new CodePipeline Definition
Navigate to Developer Tools -> Pipelines and hit the Create pipeline button.
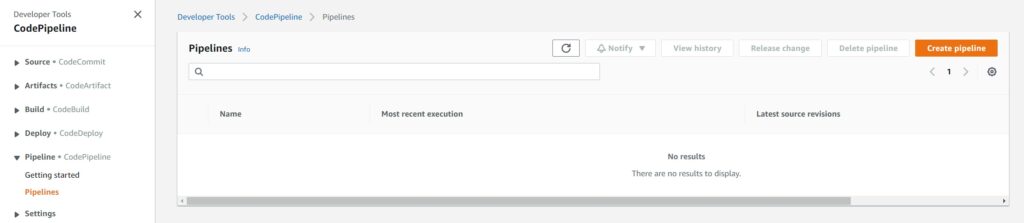
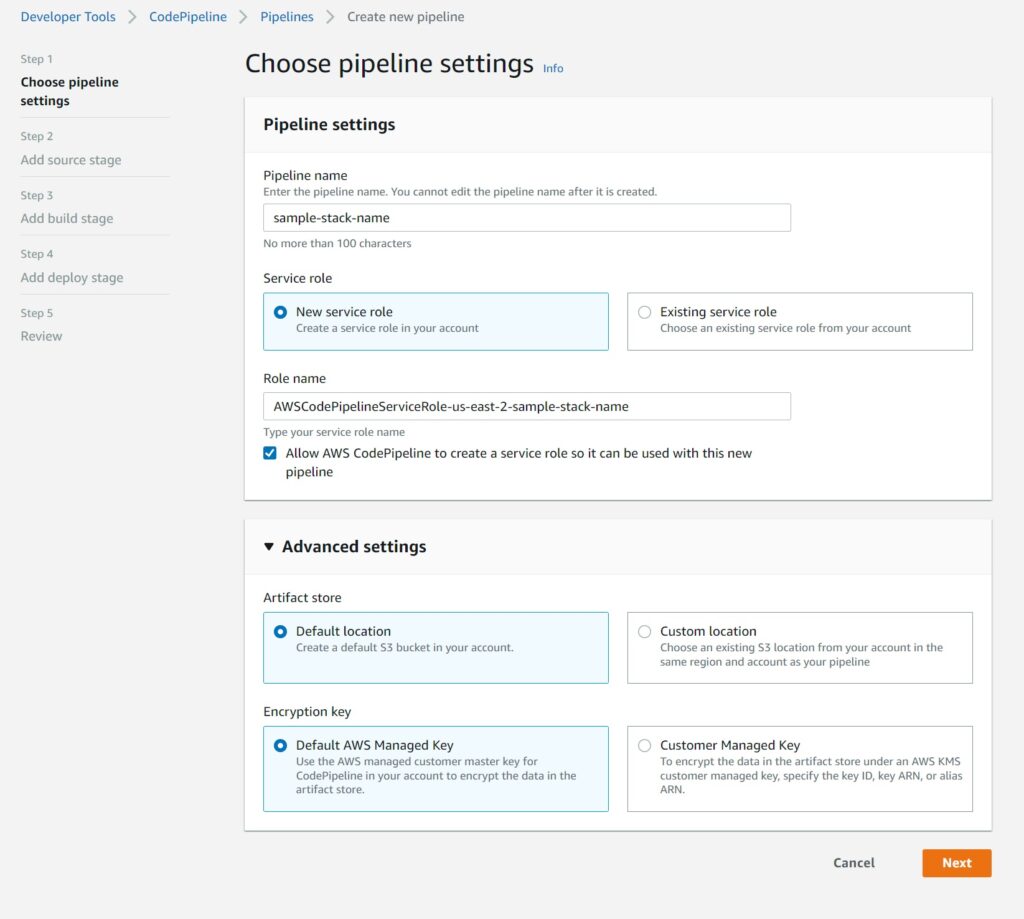
The first screen allows you to define the pipeline name and it will also prompt you to go ahead and create the roles. It will offer a region and pipeline based name – which you can change to something more generic to reuse with other pipelines should you wish.
It will create a default S3 Bucket and use a KMS key unless you need to use something else.
For the vast majority of use cases, I suspect the defaults will suffice.
Linking to a Source Code Repository
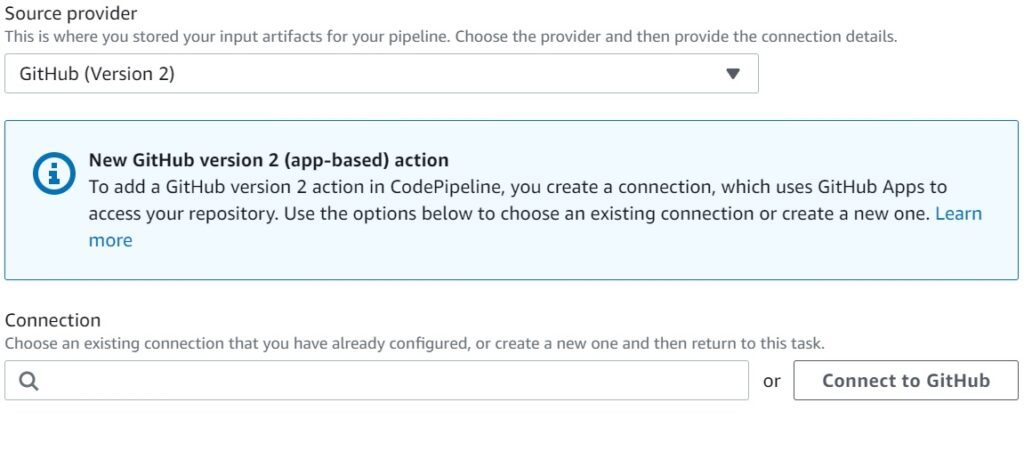
The next stage is the source stage, and the screenshot below shows the supported options as of the time of this writing.

I personally use AWS CodeCommit – just because I am on the AWS account so much it makes sense for me to have my code repository there as well without having to navigate to another site – but this is not a big deal – you just need to make a connection to GitHub as shown in the next screen after the one below – an extra step that is not necessary for CodeCommit repos.

Again I see no critical reasons not to use the defaults suggested by CodePipeline for change detection using CloudTrail and using CodePipeline build zips.
Creating a CodeBuild Project in the Build Stage
At this time, we don’t have a CodeBuild project – this will take care of actually building our CloudFormation artifacts.
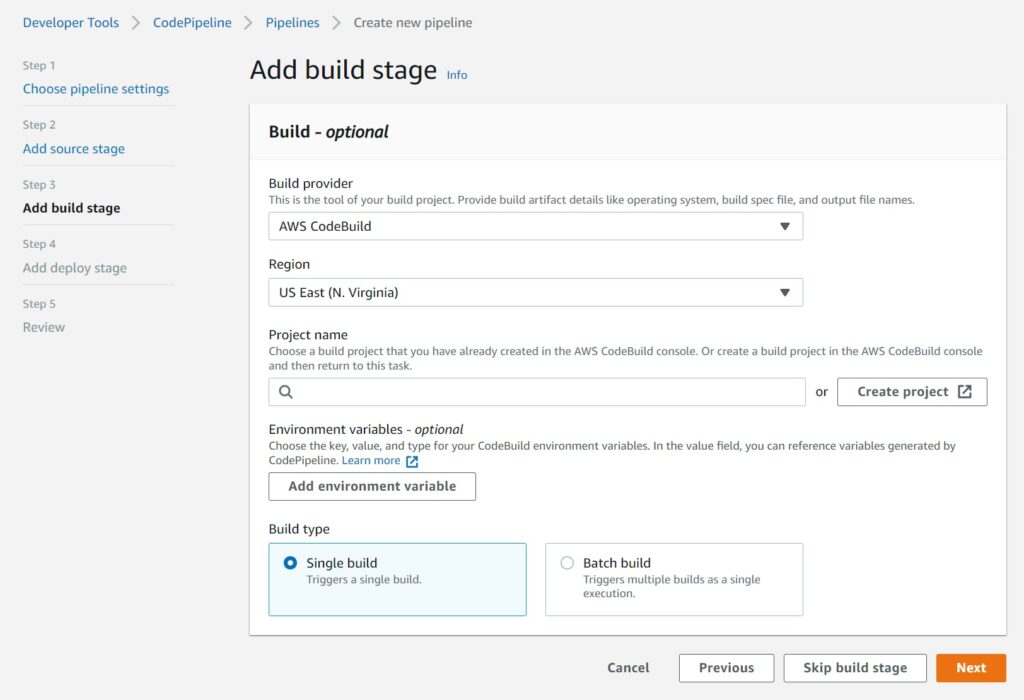
Choose CodeBuild as the provider and the region and select the “Create project” button to open up a separate window to define the build stage.
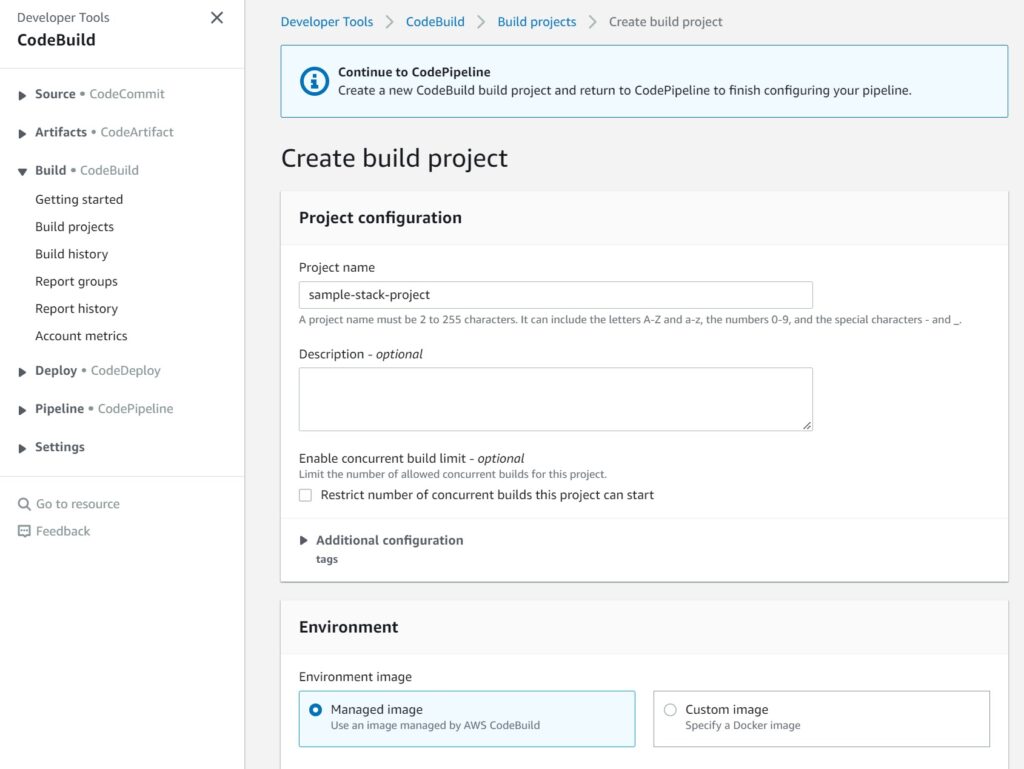
In the CodeBuild window – start by providing a meaningful Build Project name.
For our use case of building a CloudFormation Template – we simply need managed images.
Choose Docker for specialized cases that are out of scope for this guide.
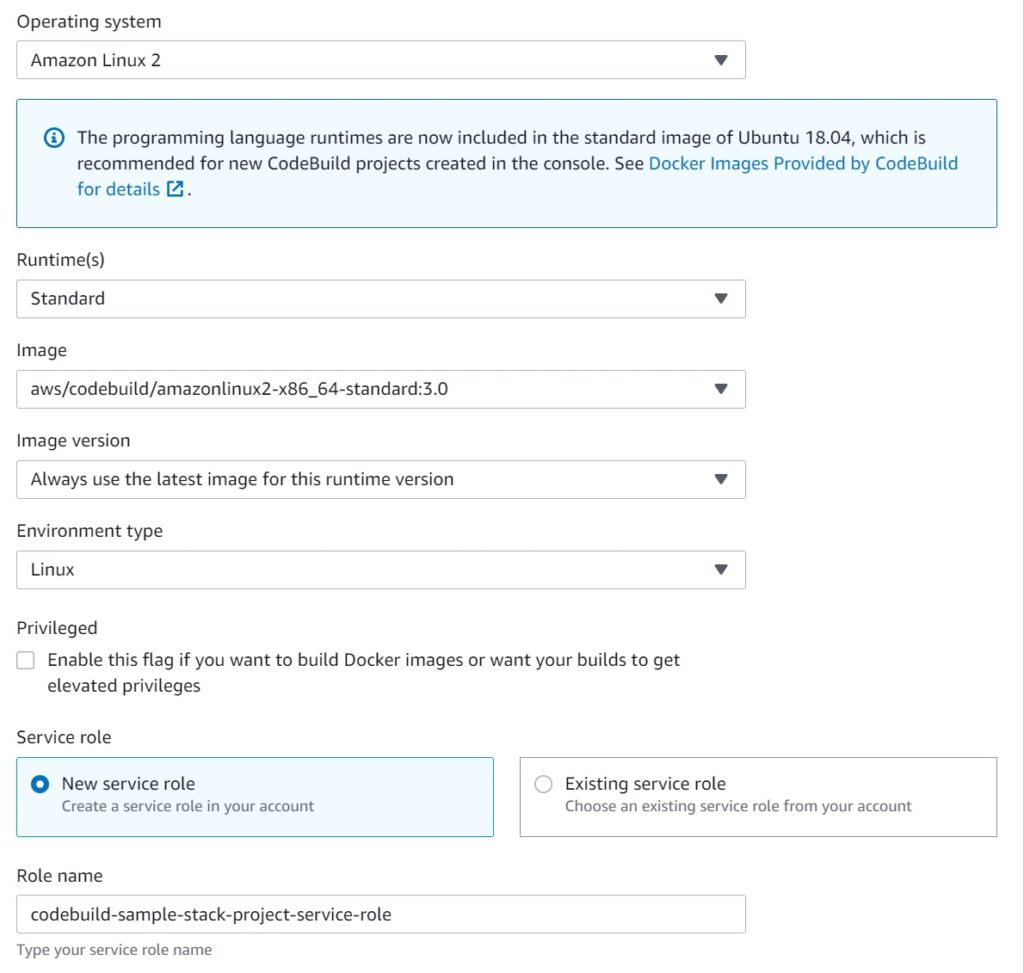
Next choose the Operating System details – go with the standard defaults for your choices and again – specialized builds like needing Windows can be chosen but is out of scope for this guide.
Allow CodeBuild to create an IAM service role for you as well.
Lastly, choose use buildspec file – I will walk through creating a buildspec file after we setup the initial pipeline.
In fact we can use the buildspec file commit to the repository to trigger the CodePipeline build and deployment process and test the setup.
Logs to CloudWatch and S3 are not needed – you get pretty detailed information from the CodeBuild console as we will see later.
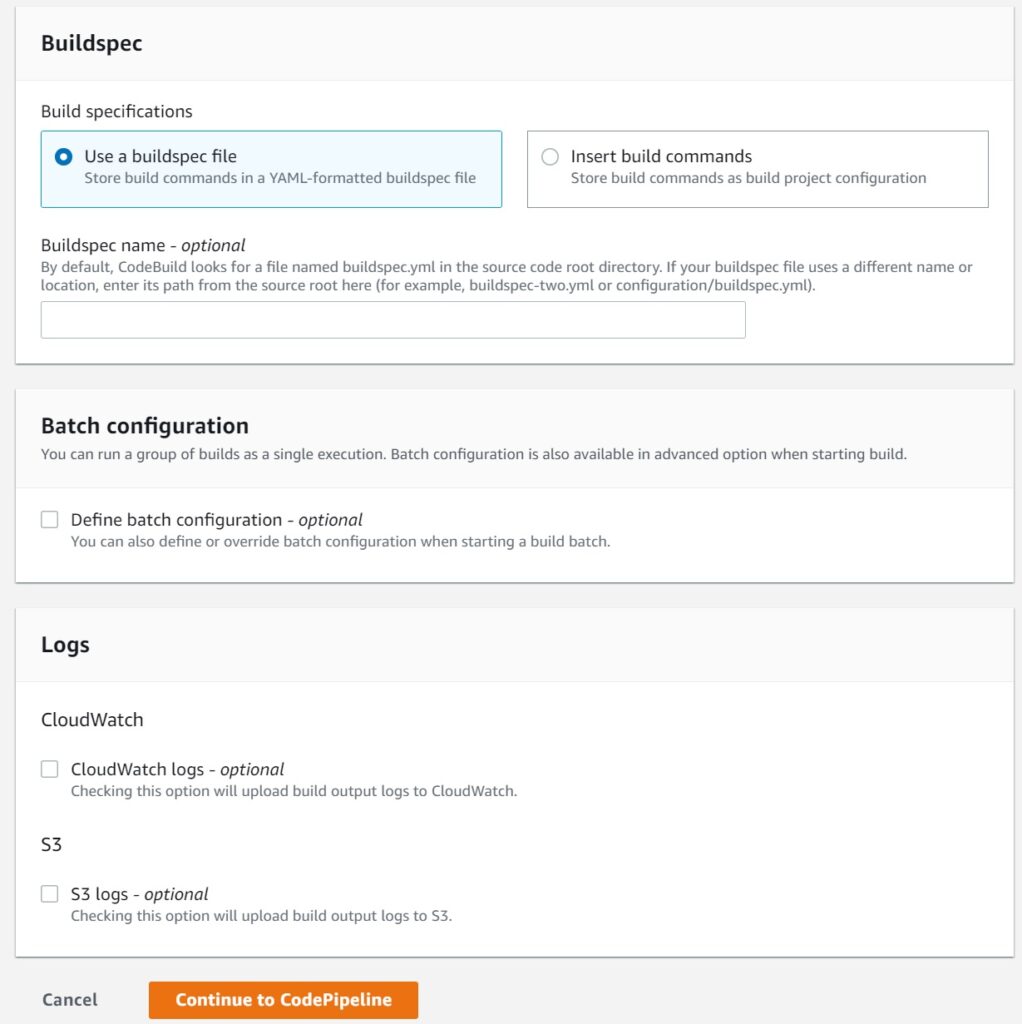
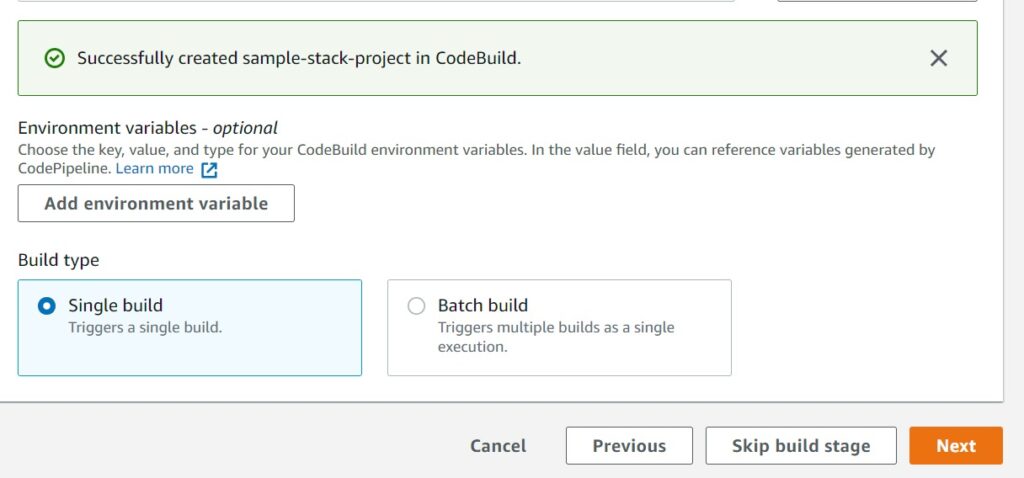
Choosing Continue to CodePipeline should get you back to the CodePipeline screen earlier before you left to create the CodeBuild project with a success message as shown below.
You can now choose to setup environment variables – but for our basic use here, we do not need them. It is a fairly simple setup we will have no matter how complex the CloudFormation Stack.
Commit, Build, Deploy. If it works, great, if it fails – we fix it and try again.
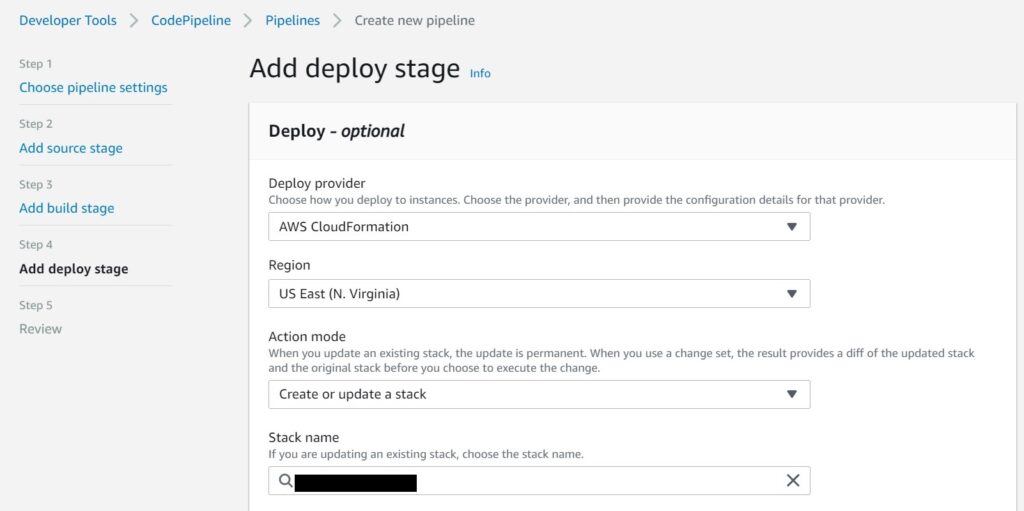
Setting the Deploy Stage using CloudFormation
For this, choose AWS CloudFormation as the provider.
Choose the Region you want this deployed to.
Choose Create or update a stack as the Action mode
Provide the stack name.
All this you will notice so far really is the same details you will provide to a samconfig.toml file if you are familiar with using CloudFormation with AWS SAM for deployments.
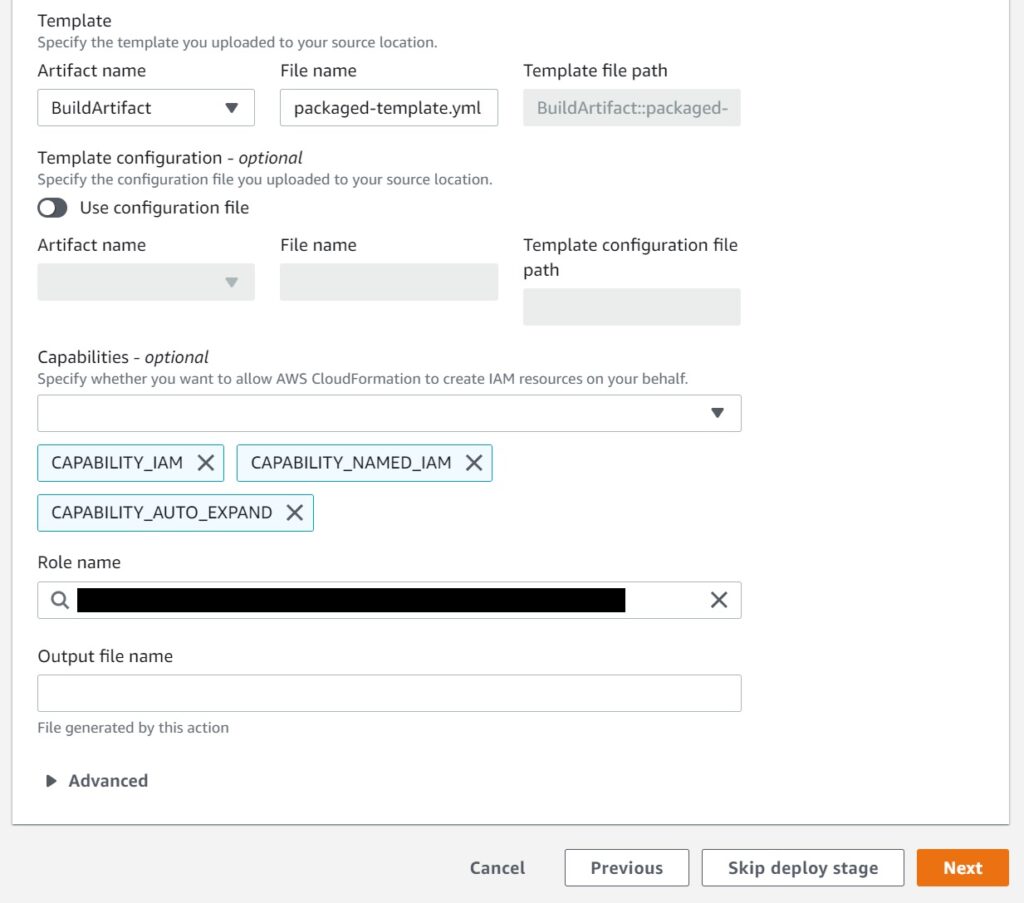
In the next section, again you will see some familiar stuff – like the list of Capabilities.
Select all of them CAPABILITY_IAM, CAPABILITY_NAMED_IAM, CAPABILITY_AUTO_EXPAND.
Honestly – I don’t know why CloudFormation doesn’t simply assume you want all this when the IAM service role was created with Admin Access – which incidentally – you need to select in the Role Name section from noting it down earlier (see the first step above).
The BuildArtifact name or rather File name – enter something meaningful – I am using packaged-template.yml – whatever you use – **make a note of it ** for use in our buildspec.yml in the next section.
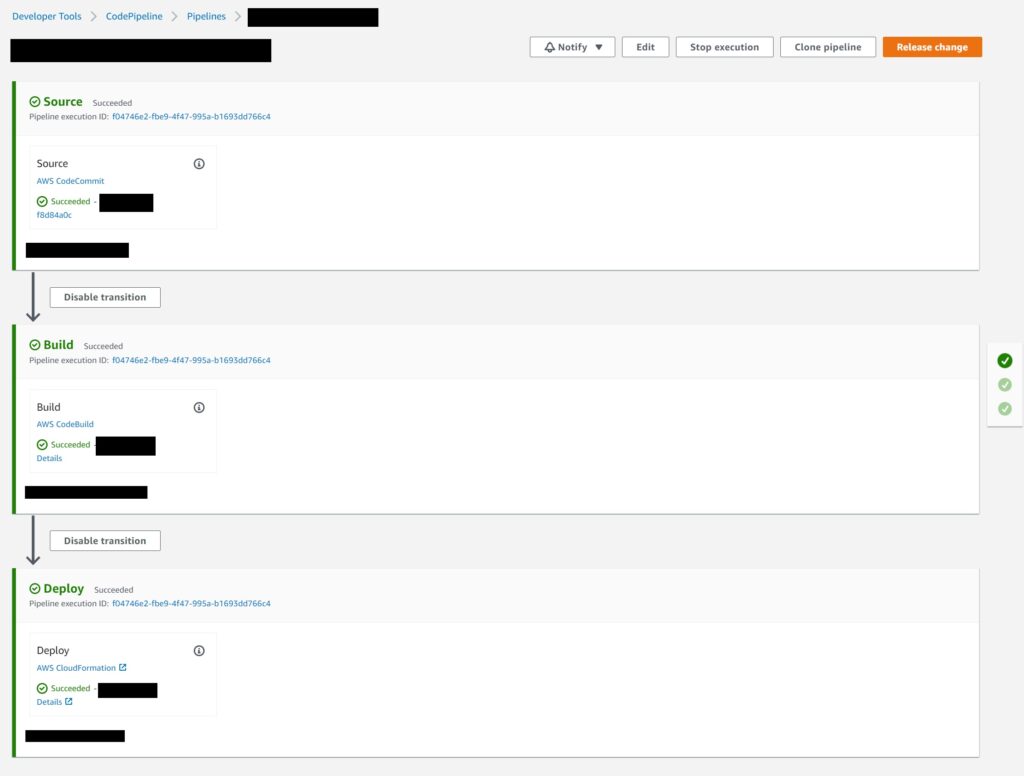
For the last screen which I have not provided a screen shot, you will get a very long review of all the stages you have defined until this point. Go ahead and create the pipeline. Which will now show up on the Dashboard as shown below.

Now lets create the buildspec file for a sample Cloudformation Stack and test this pipeline.
Creating a buildspec.yml file for a CloudFormation Stack
The buildspec.yml must be located at the root of a CloudFormation Stack project together with the template.yaml.
This guide or this article have a examples if you need a reference.
Let me first write the buildspec.yml below – it is simple (yay CloudFormation) – aside from some location moves quite similar to doing a local sam build and sam deploy – I will explain it below in any case.
version: 0.2
phases:
  install:
    runtime-versions:
        python: 3.9
  build:
    commands:
      - pwd
      - ls
      - cd <cloudformation_stack_directory_name>
      - sam package --template-file template.yaml --s3-bucket <your_deployment_s3_bucket> --output-template-file packaged-template.yml
      - ls
      - mv packaged-template.yml ../packaged-template.yml
      - cd ..
      - ls
artifacts:
  files:
    - packaged-template.yml
Going over the phases…
My runtime happens to need python for my Lambdas – pick your own runtime(s) appropriately.
The build command is using sam package – providing the template file name, the bucket to deploy the build to and the output template file name which we created earlier in the deployment phase of the CodePipeline setup – that outfile needs to match the CodePipeline definition
Other than that – we move into the project directory to compile the artifacts, and move it out to assist CodePipeline with the deployments.
All the ls commands are optional. I had them to figure out the initial errors with the compilation and artifact generation process which I solved with the cds and mvs. I left them there so you could also see whats happening with the outputs if you like.
Testing the CodePipeline by committing the buildspec.yml
Commit the buildspec.yml into your repo and merge the change into the same branch you defined in the pipeline.
It needs to be the exact branch you defined for the Pipeline to trigger.
Now you will be able to see whats happening through the stage outputs on the AWS Developer Tools console.
The Pipeline transition stages…
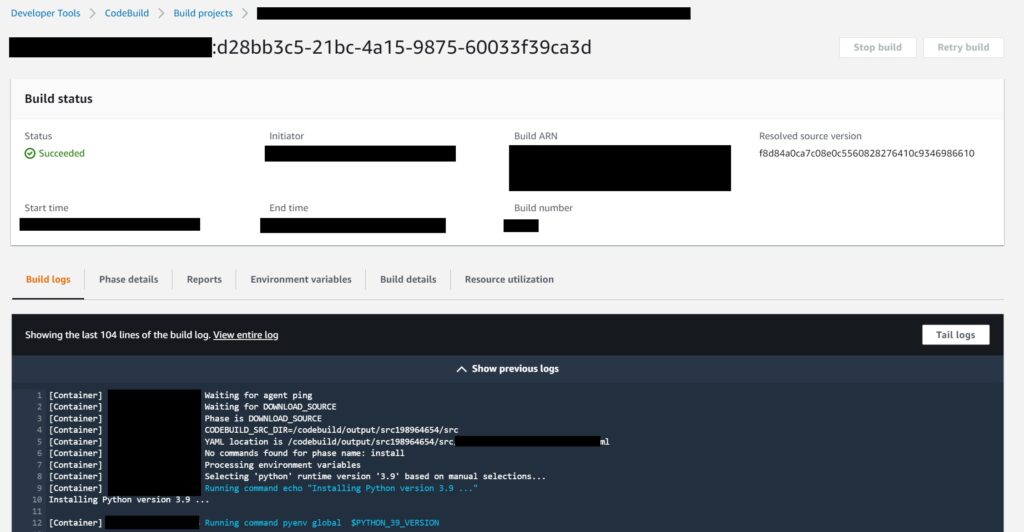
The Build logs where you even have the ability to run tail on them as they build in real time…albeit there is a lag.
And finally and most importantly – you should be able to see the successful result of the Stack update (if there was any) in the CloudFormation console.
This is the basic setup which should be sufficient for the majority of use cases at least with regards to CloudFormation Stack deployments.
In terms of further enhancements depending on your organization’s needs and requirements, it is possible to setup email alerting on the various stages just like any other CI/CD process and of course approval workflows and such.