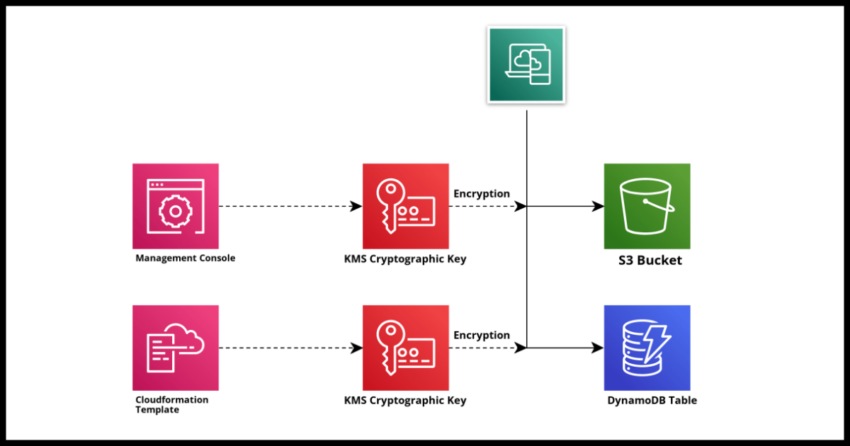
AWS Key Management Service is Amazon’s centralized offering for creating, storing and using cryptographic keys within your Amazon Webservices Accounts and across multiple other AWS services as well. In fact many AWS services, especially those that may involve data storage typically themselves make use of default AWS Key Management Service – KMS – keys even if you do not explicitly create a key yourself.
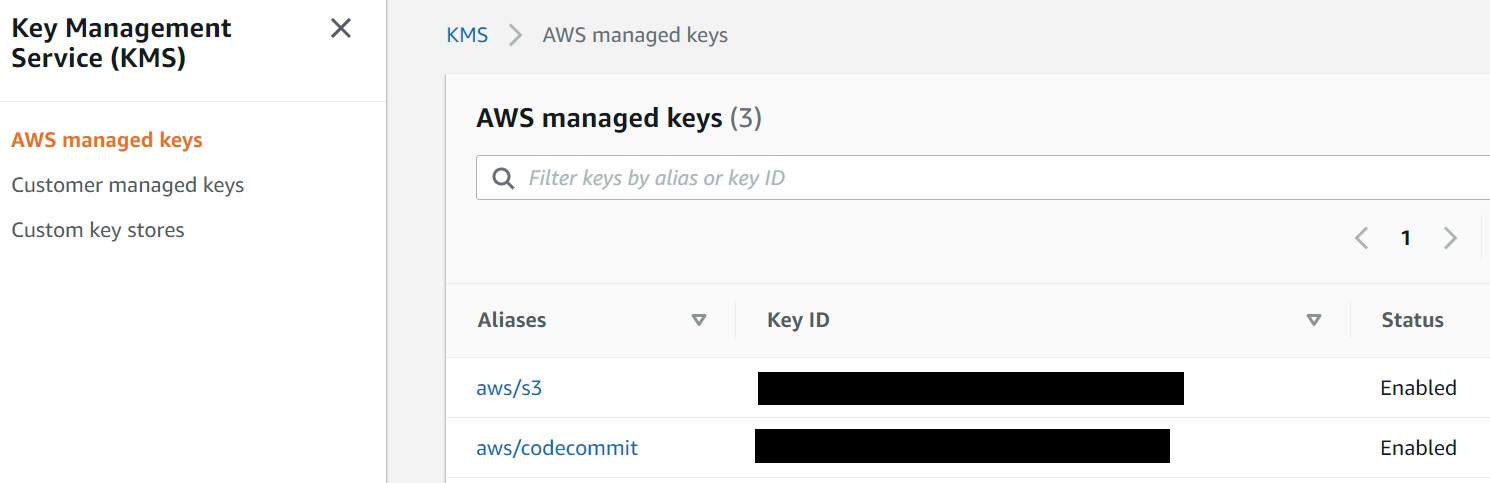
For example if you have an S3 Bucket in your account or perhaps Lambda functions, navigate to the KMS console and take a look under the AWS Managed Keys Section. You will see a list of keys that have been created automatically for each of those services you might be using in your account.
However, outside of AWS services that use the KMS keys by default, Key Management Service of course allows you to create your own cryptographic keys for different reasons. Lets cover some very high level concepts before we jump into the demonstration of the “how to create”.
Why create your own KMS Keys?
For the majority of the AWS services and use cases that will be happy to create a default KMS key for encryption/decryption needs for you, there is really no need to go and create your own key – however should you do so you can configure those services to use your own custom key.
One common reason to do so is to tailor the access policy to something that is more restrictive or fine grained compared to the default policy that AWS uses when creating KMS keys. For instance, this is the default policy associated with S3
{
    "Version": "2012-10-17",
    "Id": "auto-s3-2",
    "Statement": [
        {
            "Sid": "Allow access through S3 for all principals in the account that are authorized to use S3",
            "Effect": "Allow",
            "Principal": {
                "AWS": "*"
            },
            "Action": [
                "kms:Encrypt",
                "kms:Decrypt",
                "kms:ReEncrypt*",
                "kms:GenerateDataKey*",
                "kms:DescribeKey"
            ],
            "Resource": "*",
            "Condition": {
                "StringEquals": {
                    "kms:ViaService": "s3.<your_region>.amazonaws.com",
                    "kms:CallerAccount": "your_account"
                }
            }
        },
        {
            "Sid": "Allow direct access to key metadata to the account",
            "Effect": "Allow",
            "Principal": {
                "AWS": "arn:aws:iam::your_account:root"
            },
            "Action": [
                "kms:Describe*",
                "kms:Get*",
                "kms:List*"
            ],
            "Resource": "*"
        }
    ]
}
The IAM policy could be structured to limit the usage to perhaps a specialized admin group within the overall AWS account instead of having a wider access.
But in certain situations – you will need to create your own KMS keys and not just because of making access more fine grained.
One example – certain AWS services may require you to provide it with a custom KMS key in case you want to use a certain feature. Cognito is one example where I needed to do just that (which I plan to write about in more detail in future articles), in order to override the default Cognito emailing message mailing out access and verification codes and use our own custom mailer with branding and all that nice stuff – we had to supply a KMS key that was shared between Cognito and our own Lambda so that we could decrypt Cognito generated codes.
On that above case, there is yet another related reason to use KMS keys – it provides an associated client side cryptographic SDK which you can then make use of KMS’ centralized storage features to do your own encryption and decryption needs seamlessly. Finally when you do need to sign an verify exchanges, you may need to provide public keys to external partners and this then is another reason to use your own custom key – by creating an Asymmetric private/public key pair as opposed to the more common Symmetric KMS key which can be used for plain encryption/decryption requirements.
I do plan to write about how to use the Cryptographic SDK in code later – but this will be out of scope for this article. I am for now going to focus on the creation aspect of the Key Management Service Keys and not so much the usage.
Creating a KMS Key from the AWS Console
Before we walk through this – a quick word on the Key Policy. There is a default Key Policy that gives access to the Key that will be created to the AWS account. The AWS account and all its related services will be able to then use the key for cryptographic operations. This is often the case if you intend to work with this key with AWS services. While you do have the option to modify the final IAM policy at the final screen in the creation step – you probably want to leave the default policy on if you want to work with KMS and your own AWS account and if you do not – you probably need to consider an alternative cryptographic solution.
This is the default key policy – which is what will be created if you do not pick administrators and users in the subsequent screens.
{
  "Sid": "Enable IAM policies",
  "Effect": "Allow",
  "Principal": {
    "AWS": "arn:aws:iam::your_account_number:root"
   },
  "Action": "kms:*",
  "Resource": "*"
}
Adding Key Administrators and users allows those users to make use of the key when running specific operations with the key like using it to encrypt stuff with other AWS services.
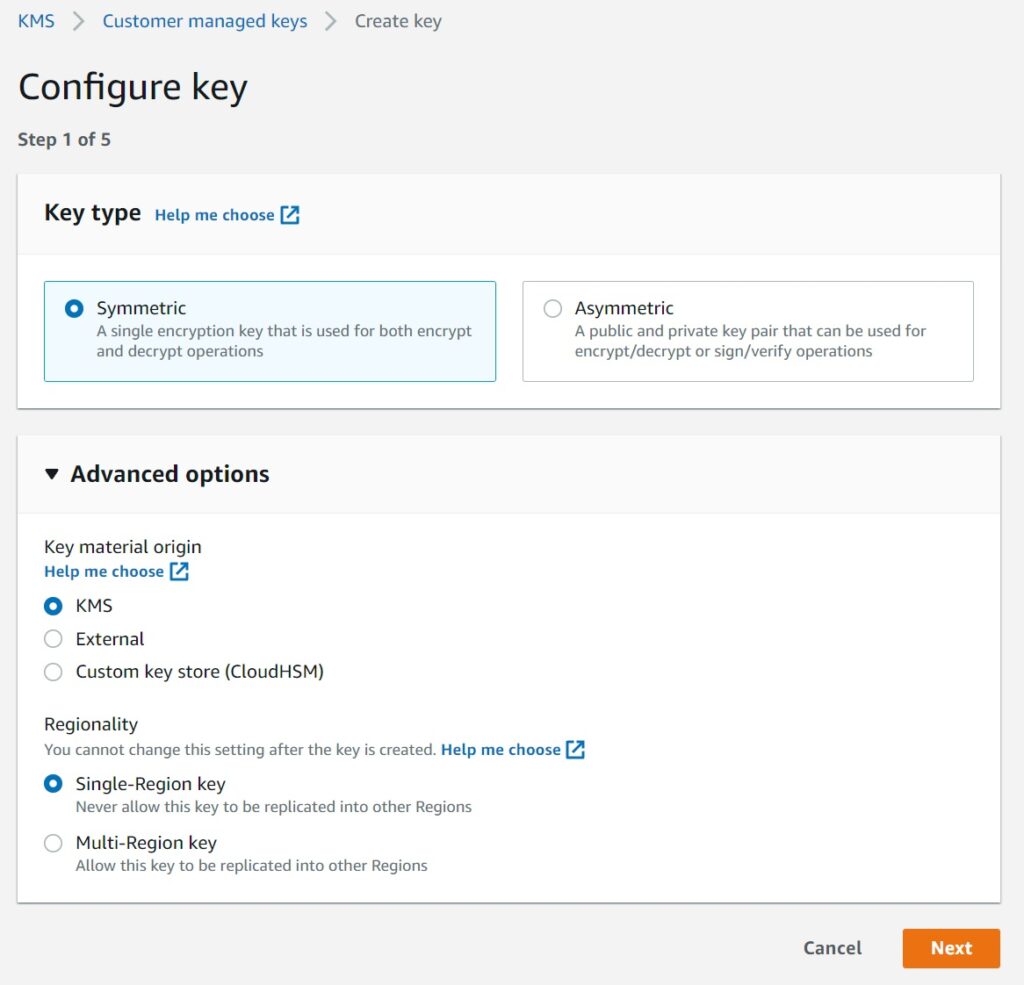
1. Creating the Key
I am picking the defaults – which is going to be a simple symmetric key
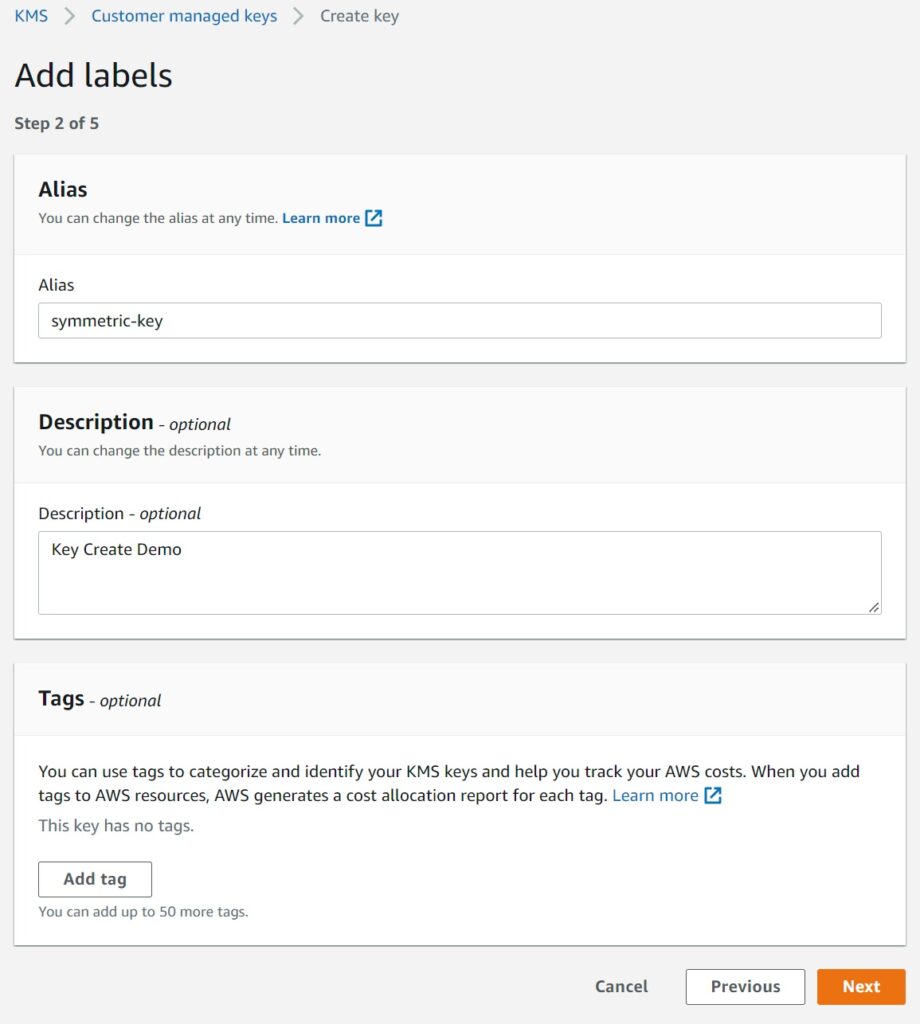
2. Naming your key for reference
3. Picking the Administrators

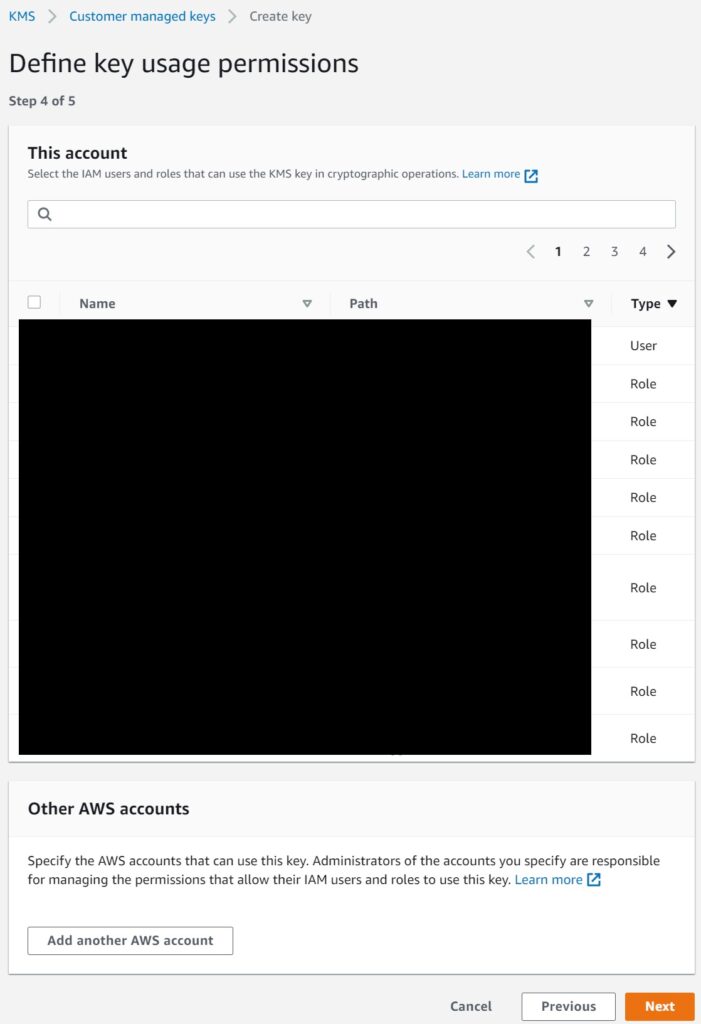
4. Picking the other non-admin users
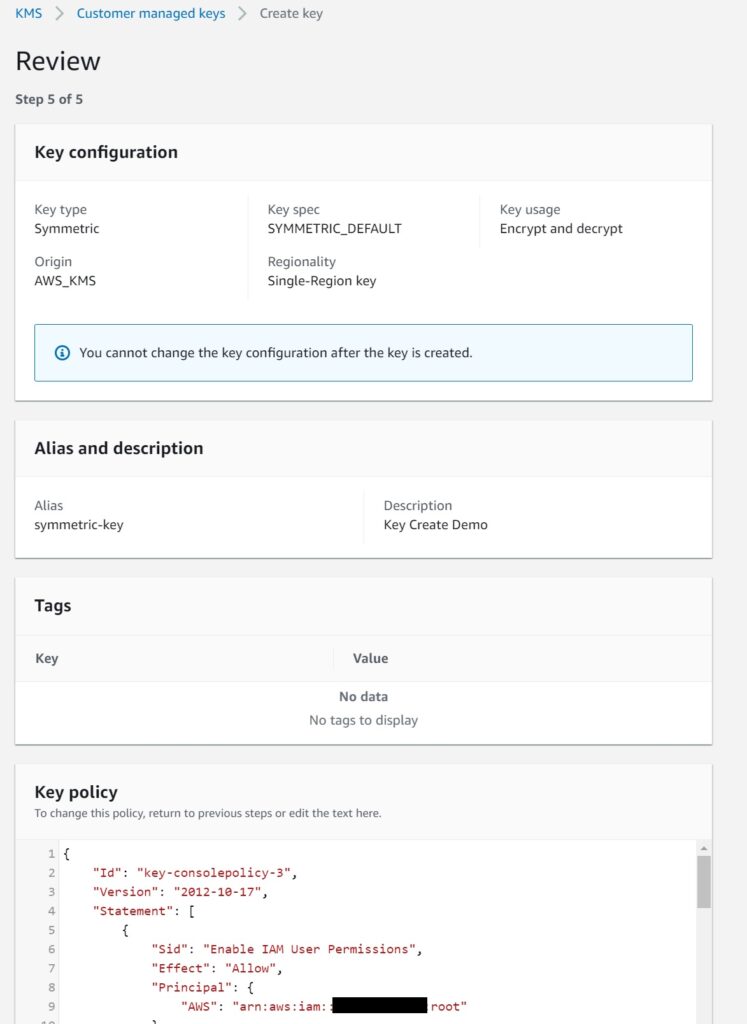
Review the policy and details
You can edit the IAM policy inline here.
If you did not pick any additional users – you will have the default policy to only let the AWS account use it.
If you need to make this Key work with a specific AWS service – other IAM edits may be required depending on what the docs for the service say. More commonly though you would be using it to make things more restrictive for AWS services than the default policy.
Note There is a mistake in the screenshot – the alias needs to start with “alias/”
Hit the create and you now have your KMS Key
Creating a KMS Key using a Cloudformation Template
Going this route has an added convenience factor when working with a single Cloudformation stack that defines your application. For instance if you are creating a custom key for a particular service to use, taking the example I mentioned earlier that I needed which was to use Cognito with a shared symmetric key – it is much simpler to have it all defined in the same Cloudformation yaml template so they can reference each other.
It is quite straightforward to define a KMS Key with cloudformation – at least with the defaults. There are of course a host of other options to create depending on your use case – but this should be sufficient as a base.
Note though unlike in the console which makes it seem like a single operation, to use your own alias – you will need to explicitly create the ‘AWS::KMS::Alias’ resource in the cloudformation yaml template. The key that is created by default is a symmetric KMS key and no specific property needs to be set for that as shown below. For an asymmetric key, “KeySpec”, “KeyUsage” properties will need to be set to choose the type of asymmetric key that will get created.
KMSKey:
  Type: 'AWS::KMS::Key'
  Properties:
    KeyPolicy:
      Version: 2012-10-17
      Id: key-policy-id
      Statement:
        - Sid: Enable IAM User Permissions
          Effect: Allow
          Principal:
            AWS: 'arn:aws:iam::111122223333:root'
          Action: 'kms:*'
          Resource: '*'

KMSKeyAlias:
  Type: 'AWS::KMS::Alias'
  Properties:
    AliasName: "alias/symmetric-key"
    TargetKeyId: !Ref KMSKey
That is that for the basics. As I mentioned, in future articles, I plan to cover cryptographic code usage of working with these KMS keys.